


 China Import and Export Fair
 Focus On Products
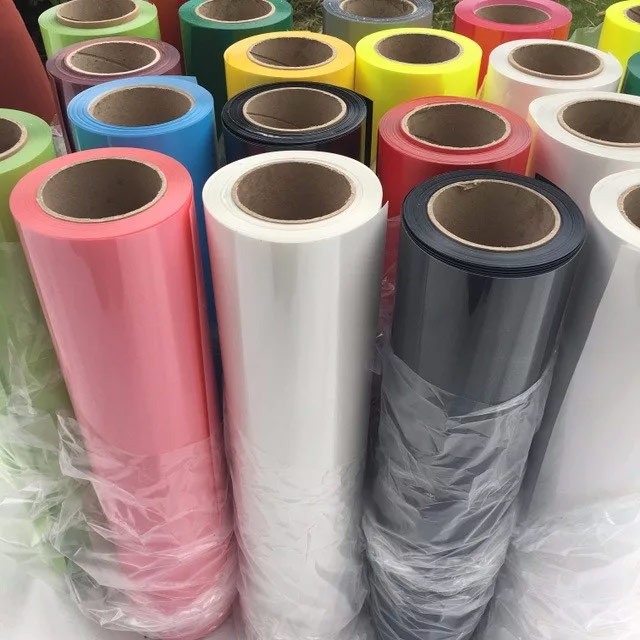
If you are reading this text, it's in all probability safe to assume you have recently set to require the plunge into heat transfer vinyl decoration - or a minimum, you are pondering it. Either way, we're excited for you! With garment customization and vinyl crafting on the increase, the potential for inventive and money opportunities within the personalization business is large. ne'er before has it been this simple to show your passion for attire style into a regular gig, and we're happy to check you take advantage.
Heat transfer vinyl (or HTV for short) may be a useful gizmo that enables you to feature personalized touches on clothes and accessories (including logos, names, and images). HTV vinyl makes this all improbably simple, which explains why such a big amount of crafters and tiny entrepreneurs are diving head-first into the warmth transfer vinyl business. however before you heat up your Silhouette anaglyph cutter and begin flexing your style muscles, it is a really expert plan to 1st become conversant in the globe of HTV and find out how it's used.
What is Heat Transfer Vinyl?
Heat transfer vinyl may be a specialty vinyl material that's wont to adorn or individualize T-shirts, garments, and different cloth things. HTV contains a heat-activated adhesive backing, that permits the vinyl to for good transfer to your garment once heat ironed with ample time, temperature, and pressure.
By employing a vinyl cutter, sort of a Silhouette anaglyph or Brother ScanNCut, you'll be able to cut digital styles into the vinyl so transfer those styles onto your shirt or garment employing a heat press. The result's spectacular, high-quality custom clothes with exceptional sturdiness similarly as look and feel.
One of the nice things concerning heat press vinyl is that there are such a big amount of totally different kinds of colors and finishes - shiny, matte, flock, stretchy, glow-in-the-dark, glitter HTV - you name it! notwithstanding what project you've, there's AN HTV that is excellent for it.
Great! Do I want something Else?
Once you’ve picked up your vinyl cutter and warmth press, you’re virtually able to go! The last stuff you want is yours provides. Let’s bear every one of them.
1. Heat Transfer Vinyl
This wouldn’t be an awfully smart journal on heat transfer vinyl if we have a tendency to unnoticed the core ingredient! As we have a tendency to express, heat transfer vinyl comes in a heap of colors and finishes. a decent place to start out is with Siser EasyWeed, which may be a normal HTV and is arguably the foremost widespread HTV on the earth. we have a tendency to conjointly suggest beginning out with normal colors like black, white, navy, and red. You’ll notice that you’ll doubtless bear these colors quicker than something.
Once you get the suspend of things, then begin experimenting with extra colors and finishes. HTV comes in each vinyl roll similar to pre-cut sheets for your convenience.
2. T-Shirts/Garments
Next up, you’ll want one thing to press your HTV onto! every one of the nice things concerning HTV is that almost all HTV works on cotton, polyester, blends, and animal skin. There are extra HDTVs that will work on nylon (EasyWeed Extra) and Lycra/spandex (EasyWeed Stretch). For sourcing your T-shirts and clothes, there are heaps of online wholesale suppliers like JiffyShirts, ShirtSpace, Gildan, BellaCanvas, and an entire bunch additional.
3. Weeding Tool
A weeding tool goes to become your best possible friend. once you’re operating with heat transfer vinyl, one of every one of the steps when cutting is to weed away excess vinyl. whereas you'll be able to take away larger parts by hand, you’ll notice that a weeding tool is very helpful if not essential for removing those smaller items.
4. Teflon cowl Sheet
A Teflon cowl sheet is important once you move to press your transfer. This cowl sheet protects your clothes from direct heat and prevents them from being singed or scorched. It is also terribly helpful once layering vinyl, which needs multiple presses and prevents the vinyl from unwittingly melting.
5. style software system
Last however on no account least, you'll want a pc and style software system. luckily, your Silhouette anaglyph, Brother ScanNCut, or Graphtec cutter can go with its own style software system that you simply will use to form styles and cut files. That’s at no additional price to you! you'll be able to conjointly use additional refined programs like Adobe Photoshop, artist, and CorelDRAW if you would like extra flexibility and customization.
How to Use Heat Transfer Vinyl to form Your 1st Custom shirt
All right! We’ve spent heaps of your time talking concerning the various instrumentation and provides you'll want, therefore however concerning we have a tendency to dive in and show you the way to use heat transfer vinyl. As we’ve mentioned, the method of decorating with HTV is super simple to induce the suspension of, and we’re assured that you’ll be up and running in no time. therefore let’s start.
Step 1: Style Your Cut File
Once you’ve got all of your providers, and your vinyl cutter and warmth press are got wind of, you'll wish to form a style on your pc to chop into the vinyl (also referred to as a cut file). the best thanks to do that is by mistreatment of the software system that comes together with your vinyl cutters like Silhouette Studio or Brother CanvasWorkspace.
These programs are terribly easy, and there are 1,000,000 and one YouTube tutorial for them that will assist you to start. Plus, if you feel diagrammatically savvy, you'll be able to even get premade styles to chop - on Etsy, from Silhouette/Cricut, and a number of different websites.
While coming up with your cut file, forever confirm to prevent and check your work. live your things and change your settings to confirm your style outputs at the right size. If your design includes text, check to form positive all orthography seems correct and every font is formatted systematically.
Lastly, before you send your style to the cutter, it’s vital to form positive your image is reflected (reversed horizontally). as a result of you are cutting the backside of the warmth transfer vinyl, your style must be reflected. once you move to press it, it'll be facing the right approach.
Step 2: Load Your Vinyl Cutter & Set Cut Settings
Once your cut file is prepared, it is time to load your vinyl cutter up together with your favorite HTV. Now, if this can be your 1st time handling heat transfer vinyl, you will need to listen to a few things.
First, you may notice that your HTV has a shiny aspect and a dull/muted aspect. The shiny aspect of the vinyl material is the carrier. The plastic-y carrier holds the warmth transfer vinyl items in situ throughout the application to confirm the cut style is aligned properly. the other aspect, that features a muted color, is the adhesive aspect of the HTV material, and this may be the aspect that will find yourself receiving the cut. it'll even be the aspect that touches the garment once you move to press it. thereupon in mind, you'll wish to load your vinyl cutter with the carrier aspect face-down. Remember, you are putting on the adhesive aspect.
Next, confirm your cutter is about to the right settings for that individual vinyl. as a result there are heaps of various HDTVs on the market, with varied thicknesses, and you'll wish to regulate your cut settings consequently. Some vinyl needs additional “force” than others. an excessive amount of force and you'll be able to find yourself cutting through the plastic carrier. Too little, and you will not be ready to properly weed away excess vinyl.
For instance, we have a tendency to suggest cutting Siser EasyWeed with a force of four and a speed of eight on the Silhouette anaglyph. On the Brother ScanNCut, this interprets to a cut speed of one and a cut pressure (force) of one - and within the image higher than, we have a tendency to add a half-cut pressure of four.
In distinction, Siser Glitter is cut with a force of eleven and a speed of eight. Glitter needs this additional force as a result of its way thicker vinyl than EasyWeed. If all of these utter-cut settings have your head spinning, do not worry! we've all of the directions arranged out for each single heat transfer vinyl on our website, and our school team is simply a telephone or email far away from ensuring your settings are perfect!
Step 3: Run a take a look at Cut
When your HTV is loaded, and you've got input your cut settings, run a take a look at the cut before you chop your entire style. A take-a-look at cut is usually a tiny low sq. or triangle in your vinyl, and this may enable you to check if you would like to form any unpunctual changes to your cut settings before cutting. It’s a tiny low quantity of effort which will prevent heaps of cash and problem – there’s nothing worse than cutting a whole style solely to own the cutter not absolutely cut across the vinyl (or cut across the carrier!).
Step 4: Cut Your Vinyl
Alright, the large moment has finally arrived! It’s time to send your style to the cutter and let it work its magic.
Step 5: Weed Away Excess Vinyl
After your style has been cut, it is time to get rid of the surplus vinyl that is not a part of your cut style. this can be unremarkably referred to as weeding. you'll be able to begin by peeling the surplus HTV from the carrier by hand, however, you will probably desire a weeding tool on-hand to assist take away the little and complex items.
Step 6: Heat Press the HTV to Your Garment
Once all of the superfluous vinyl has been removed, you are able to heat press your style to your garment!
To do this, 1st load your shirt onto your heat press’s bottom platen. Then, align and place your transfer on the prime of the shirt and canopy with a sheet of Teflon. Your transfer ought to currently be facing the right direction (no longer mirrored).
Next, press your transfer onto the shirt mistreatment the suggested press settings for your vinyl. a bit like with the cut settings, the warmth transfer vinyl you employ will have a selected time, temperature, and pressure for perfect results. for example, Siser EasyWeed is ironed at 305°F for 10-15 seconds with medium pressure. Siser Glitter is ironed at 320°F for 10-15 seconds with serious pressure.
After your timer pops, pop open the warmth press, peel the plastic carrier from the garment, and your vinyl has with success adhered to the garment! Congrats! you've got a replacement custom shirt.
Heat Press Settings for HTV
Now, you must be able to hit the bottom running! For your reference, here are the pressing settings for a few of the foremost common heat transfer vinyl by Siser and XPress Cut. it should be useful to print this chart out or to form your own cheat sheet to stay close to your heat press. That way, you may always remember the warmth transfer vinyl temperature and time needed for pressing differing types of vinyl!
Ready to start
Ready to formally enter the globe of garment decoration? Here's one last listing to see to confirm that you are coming out on the proper foot!