


 China Import and Export Fair
 Focus On Products
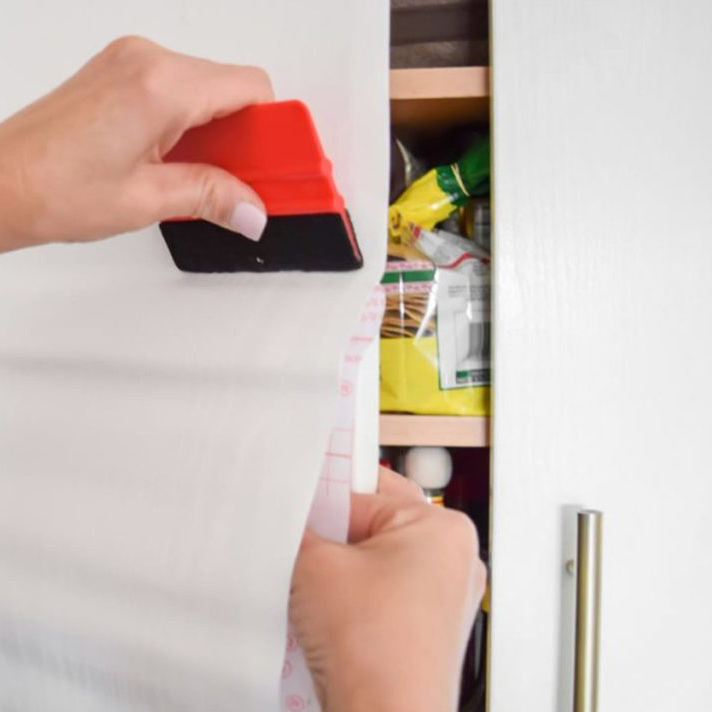
")
Crafting with adhesive vinyl is tedious. making personalized water bottles to signs and adhesive vinyl will get it on all, however, typically we will get into hassle with our crafting comes. Not solely is it disconcerting after we run into a retardant with our craft, however, it also can ruin your vinyl and price you heaps of cash. Gathering info is crucial once finding problems once crafting with this product before sitting down and beginning your craft. For first-time crafters, this can be important. Here are some tips below which will prevent a buck or two!
Tip # 1: the way to get the vinyl to stay to metal or glass.
You have simply created your 1st decal, and you're able to stick it to the merchandise. after you attend take away the transfer tape, the decal does not adhere to the item! the primary issue you'll wish to try to do is confirm that the extent is clean. I mean spotless! confirm there are not any oils from your hands or dirt on the item. attempt mistreatment application once improvement the issue. If you're still experiencing some oily residue, you'll attempt mistreatment with some nail varnish remover. confirm the surface is dry and untouched before making an attempt once more with the decal. Are you continuing to have trouble? you'll be able to attempt to leave the transfer tape on the vinyl for a small amount once applying it to the surface. typically it simply takes time for things to stay.
Tip #2: the way to get the vinyl to stick to the wood.
Honestly, I feel that the adhesive vinyl appearance is lovely on wood. there's simply one thing regarding it. However, operating with rough timber, as an example I would not want that on anyone. If your adhesive vinyl has a retardant protruding from the wood, it may simply mean you wish to present it with another sanding. make sure that you're sanding your timber therefore there seem to be no splinters or something that may cause the surface to be uneven. Sanding helps heaps after you are smoothing down your vinyl. This prevents it from obtaining stuck-on rough spots in your wood, inflicting the vinyl to tear, tear, or fold. If you would like to travel another step additional, look at painting a varnish to fill in any holes or cracks that will be inflicting you some hassle. Now, if you continue to what the piece of wood to appear "rustic" and you would like to stay the cracks, attempt employing a heat gun or hairdryer. once applying the vinyl to the surface, activate the warmth. it'll facilitate the vinyl adjustment to uneven surfaces higher. the warmth can offer the adhesive vinyl a lot of flexibility.
Tip #3: the way to get your vinyl to stay to the transfer tape.
Are you having a bit of hassle obtaining the vinyl to stick to the transfer tape? Your transfer tape is perhaps not sticky enough! Not all transfer tapes are created equally. It depends on if you bought it from a greenback store V.S associate actual craft store. Also, tapes have all different kinds of levels of adhesive tack. For heavier styles of adhesive vinyl like glitter, you'll wish to use a stronger adhesive to choose it up off the backing.
Tip #4: the way to get the adhesive vinyl to unharness from the transfer tape.
Transfer Tapes sold-out By RQC provide If you're making an attempt to use vinyl and it isn't cathartic from the transfer tape, the tape could sticky! If the transfer tape is simply too sticky, there is no way to urge the vinyl to stay to the surface you're making an attempt to use. I might attempt mistreatment on another tape that's not sticky. Another answer would be to de-stick your tape. attempt to apply the tape to alternative surfaces before protruding it into your vinyl. Some places to de-stick tape are; jeans, blankets, or something fuzzy. Let a number of the fibers attach to the tape as a result that's what makes the tape less sticky.
Tip #5: the way to get your vinyl to come back off the backing properly.
Are you having some hassle with the backing of our vinyl? typically, this suggests that you simply are cutting too deep. Decrease the pressure n your cut. If it cuts the backing of the vinyl, it makes it tougher for the vinyl to unharness from it. Next time regulate your settings, therefore your cut is not that deep. I might recommend a take a look at the cut before doing any bigs comes.
Tip #6: the way to get your vinyl to weed properly
If you're doing associate tortuous style, you'll run into issues once weeding the item. for instance, the letters won't stay on the backing paper and carry once actuation the negative vinyl is away. The blade wasn't sharp enough after you performed the cut. to urge a clean style, you'll have to be compelled to replace the blade. If you do not have a replacement, attempt swiftness down the speed on your cut settings. Still, having some hassle together with your adhesive vinyl? typically it isn't the cut that's the matter. It simply is also a rigid style to weed. attempt reverse weeding. rather than weeding your style on the backing of the paper, attempt weeding it once you've got applied the transfer tape thereto. Place the transfer tape 1st right once you chop the look. realize the backing of the paper and weed it on the transfer tape instead. Transfer tape tends to carry on to your art over the backing would. Another issue to appear would be replacing the cutting strip on your machine. If you notice that the look cut is okay on one aspect of the vinyl sheet but not therefore beautiful on the opposite, you ought to replace that.
")
")
")
")
")